 Thanks for connecting!


Bandana Singh
20 min read
July 4, 2024


Table of Contents
-1.jpg)
Autodesk Revit is a leading BIM (Building Information Modelling) software that has transformed the AEC (Architecture, Engineering, and Construction) industry by enabling professionals to design, manage building projects, and visualise with unparalleled accuracy and efficiency. Its features make it an essential tool for designing 3D models and streamlining workflows between the team and other departments. Learning Revit architecture can seem a bit challenging, but with the right guidance and understanding, you can get started with it. So, if you are new to Revit architecture or a beginner aiming to enhance your skills, we have got you covered.
Read the blog to learn the steps to get started with Revit—from how to download and install Revit to saving your files and learning vital keyboard shortcuts.
Introduction to Autodesk Revit
Revit is a Building Information Modelling (BIM) software for 3D modelling, used by architects, engineers, and construction experts. Understanding Revit architecture for beginners is crucial to learn about its core features and benefits.
Autodesk Revit for beginners is an advanced Building Information Modelling (BIM) software widely used by architects, engineers, and construction professionals. It allows users to design, model, and document buildings in 3D, making the process faster and more accurate.
1. What is Revit
Revit architecture software is built by Autodesk, which facilitates multiple features like Revit 3D modelling, enabling professionals to create precise design structures. Its key benefit is its extensive library of Revit families, which allows users to integrate standardised components into their projects. With easy access to Revit downloads, users can keep their software up-to-date and leverage the latest features to optimise their design and construction workflows.
Revit is a BIM software that integrates design and documentation in one platform. It automatically updates changes across all views, ensuring accuracy throughout a project.
2. Key Features of Revit
Revit has multiple sets of tools and features that enhance the efficiency and accuracy of building design and documentation. Here are some of the key features of Revit that you should know:
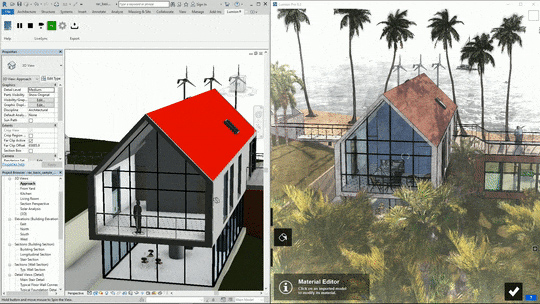
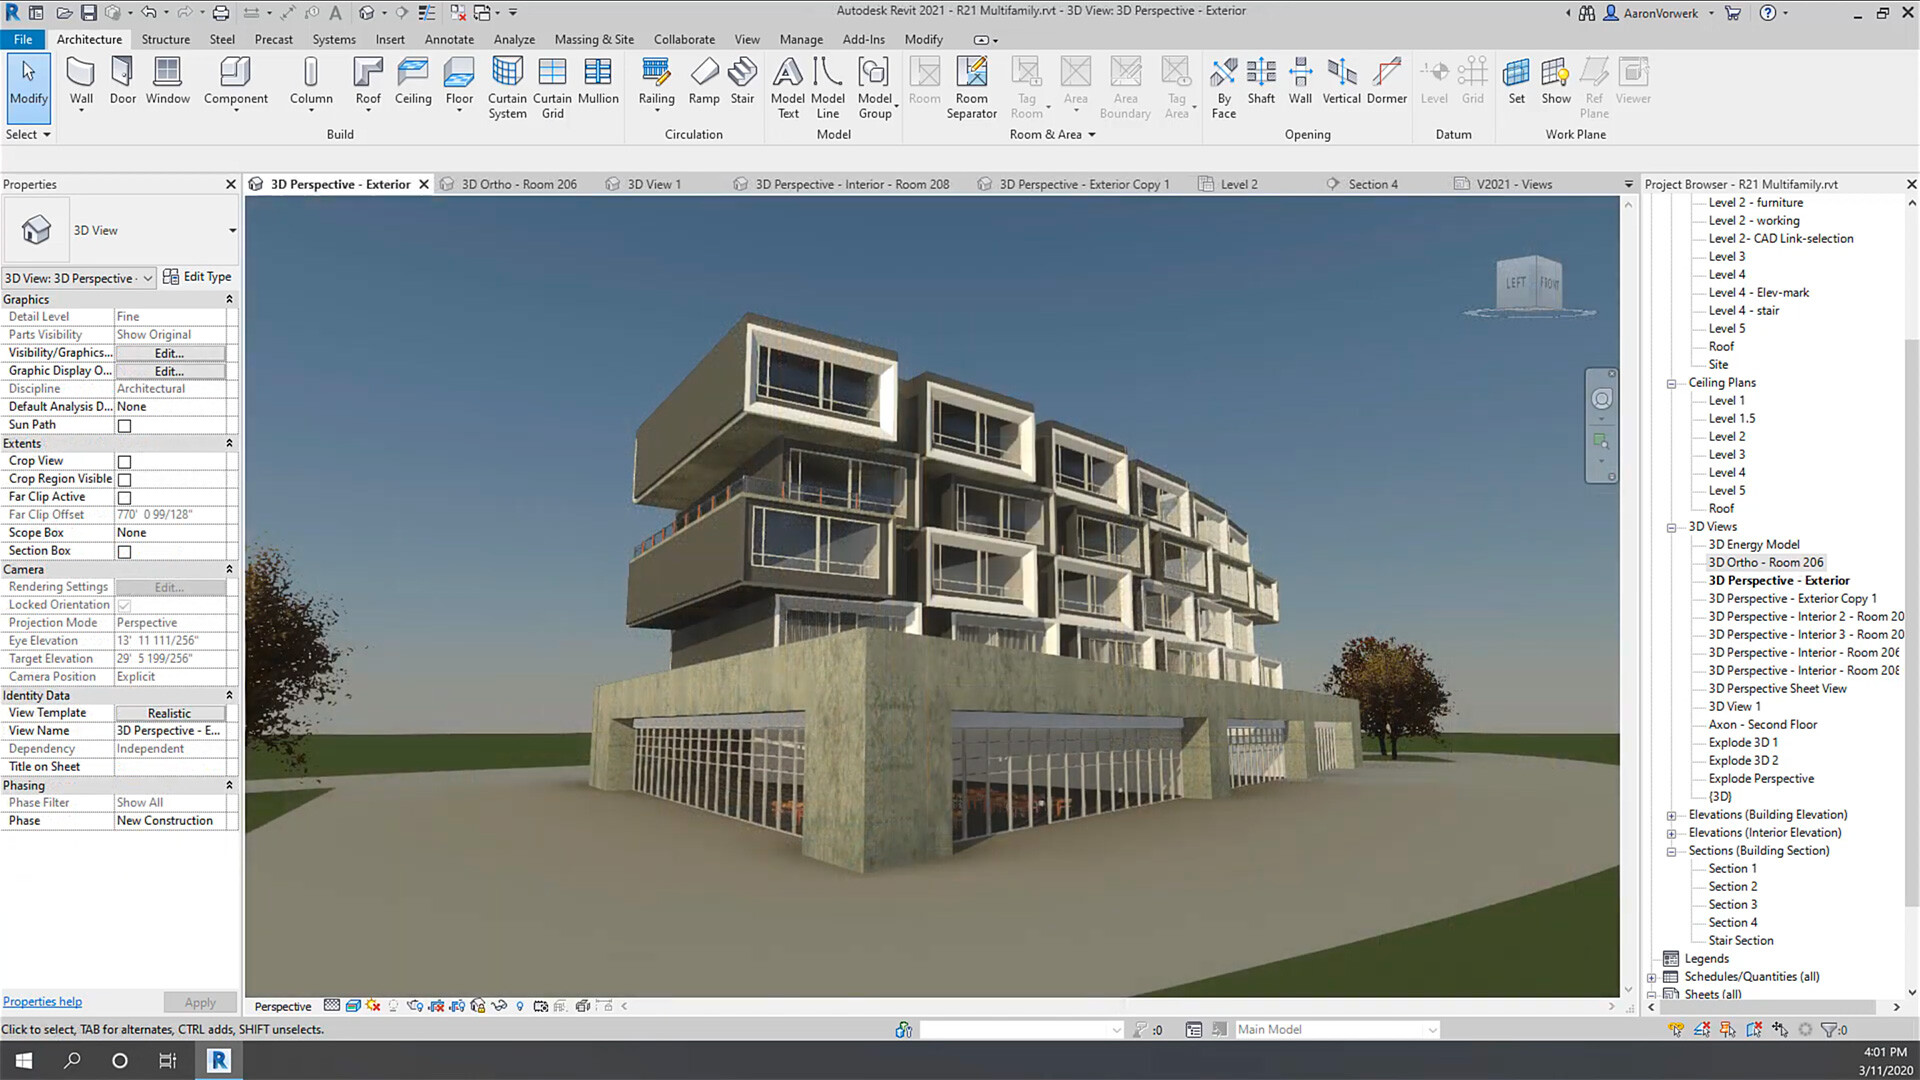
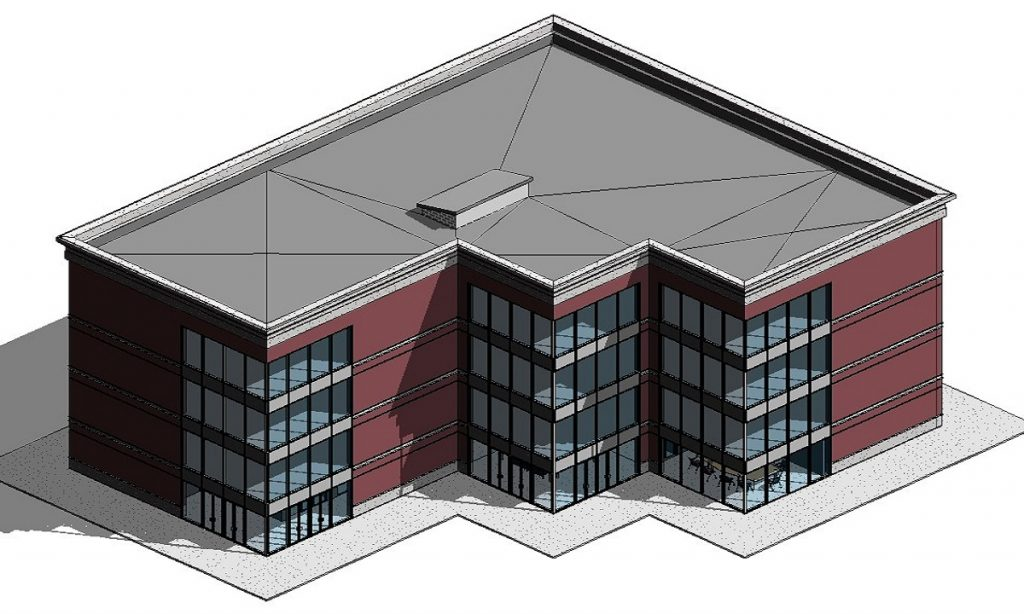
- Comprehensive 3D Modelling: It is one of the prominent features of Revit. This feature allows architects and engineers to create projects in three dimensions to see realistic design representation for better understanding. Revit modelling leads to improved decision-making and decreases the chances of errors.
- Efficient Use of Shortcut Keys: Revit includes a wide range of Revit shortcut keys, which provide quick access to commonly used functions and tools, significantly speeding up the design process. Learning and using these shortcut keys is essential for maximising efficiency in Revit architecture software.
- Advanced Rendering Features: With Revit rendering tools, users can produce high-quality, photorealistic images and animations of their projects. It is useful for presentations and client approvals, allowing stakeholders to see the project in a realistic context. Revit architecture rendering helps showcase the aesthetic and functional aspects of the design, enhancing overall project communication.
- File Management: Revit supports various Revit file types, allowing smooth information sharing and collaboration among team members. This feature ensures that all project data is accurately captured and easily accessible, improving overall project management and coordination.
- Flexible Grouping and Levels Management: Revit simplifies the management of complex projects with tools for how to group in Revit and how to add levels in Revit. These features help organise and structure projects efficiently, making it easier to manage different design aspects and construction processes.
Key features include parametric modelling, 3D visualization, and multi-user collaboration. Its smart components and coordinated updates reduce design conflicts.
3. Importance of BIM
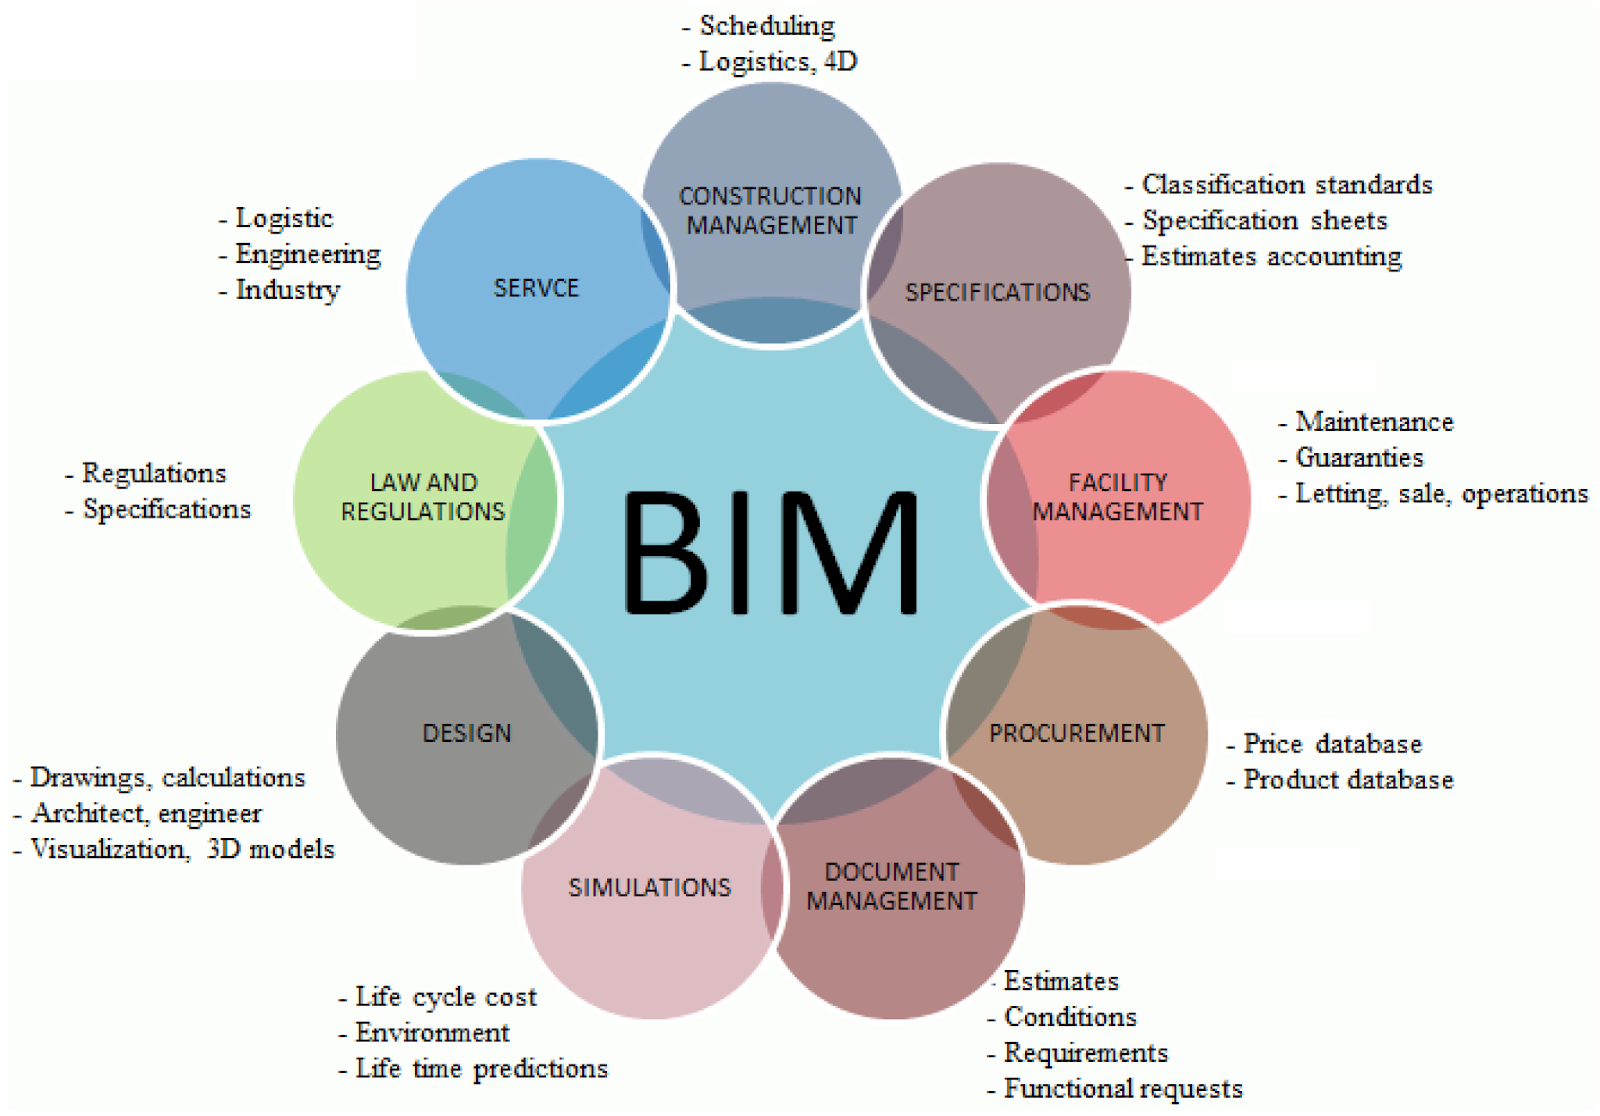
BIM is an extensive process that involves creating and managing digital figures of the physical and functional characteristics of a structure. Its importance cannot be ignored, especially when integrated with advanced software like Revit. Here are the top benefits of BIM:
- Promotes Coordination Between the Teams: One of the primary benefits of Revit is its ability to foster enhanced collaboration among project stakeholders. BIM enables multiple disciplines to work on a single, unified model, ensuring that architects, engineers, and construction managers are always on the same page. Besides this, it also enables multiple Revit file types, facilitating seamless information sharing and reducing the chances of misunderstanding between the teams.
- Smooth Design and Construction Process: BIM eases the entire design and construction process by integrating all aspects of a project into a single, cohesive system. Revit enhances this integration by offering tools for how to group in Revit and how to add levels in Revit, which help in organising and structuring projects efficiently. This reduces the likelihood of errors and omissions, leading to smoother project execution and improved overall quality.
- Efficient Project Management: By integrating all aspects of design and construction into a single platform, BIM tools ensure that all project information is accurately captured and easily accessible. Revit enhances this by providing a range of Revit tools designed specifically for project management. These tools help in generating detailed project documentation, including schedules, material take-offs, and construction drawings, organising the entire process from design to completion.
- Enhanced Productivity with Revit Shortcut Keys: Efficiency in the design process is greatly enhanced by using Revit shortcut keys. These shortcuts provide quick access to commonly used functions and tools, significantly speeding up the workflow. For beginners, learning these shortcuts can make a huge difference in productivity. Numerous Revit architecture tutorials for beginners are available online, offering guidance on how to use Revit and effectively employ these shortcuts.
- Advanced Modelling and Simulation: Revit modelling capabilities allow for detailed simulation of various design scenarios, enabling professionals to assess different options and make informed decisions. This is particularly valuable in complex projects where multiple design alternatives need to be evaluated. Revit supports these simulations through its robust modelling tools, providing a comprehensive platform for analysis and optimisation.
BIM enhances coordination by connecting architecture, structure, and MEP systems in one model. This minimizes errors and improves efficiency.
Also Check out: Advanced Revit and BIM Techniques
4. Purpose of Using Revit in the AEC & MEP Industry
Revit is highly crucial for the AEC and MEP (Mechanical, Electrical, and Plumbing) industry as it offers an efficient, integrated, and comprehensive approach to design and build the building. Here are the key purposes of using Revit Architecture software:
- Extensive Library of Revit Families: Revit offers a vast library of Revit families, which are pre-built components that can be easily customised and reused across different projects. This saves time and ensures consistency in design standards.
- Detailed 3D Modelling: Revit allows for highly detailed and accurate Revit 3D modelling, allowing professionals to visualise and analyse projects in a realistic and immersive manner, enhancing design processes and decision-making processes.
- Better Collaboration and Coordination: Revit collaborative features allow multiple team members to work on a project simultaneously. It ensures better coordination and reduces the chances of errors. The software also supports different Revit file types, promoting seamless information sharing.
- Custom Family Creation: Learning how to create a family in Revit is essential for maximising the software's potential. Custom Revit family creation allows professionals to add components to specific project needs, ensuring greater flexibility and precision.
- Streamlined Project Documentation: Revit's capabilities extend to generating detailed project documentation, including schedules, material take-offs, and construction drawings. This ensures that all project information is factually captured and easily accessible.
- Support from BIM Modelling: Revit is crucial in BIM, providing a digital view of the physical and functional characteristics of a facility. BIM is crucial for effective project management and coordination, making Revit an indispensable tool in the AEC and MEP industries.
Revit streamlines teamwork in the AEC and MEP industries. It supports coordination, reduces rework, and enhances design visualization, helping teams deliver faster, more accurate projects.
Steps to Download Revit
Do you want to install Revit and ensure it runs smoothly on your system? If you are new to Revit architecture for beginners, this step-by-step process will help you understand how to install Revit and ensure it runs smoothly on your system.
Before installing, confirm your system meets Revit’s requirements, then create an Autodesk account to access downloads.
1. Systems Requirements to Install Revit
Before you download Revit software, it is important to ensure that your system meets the minimum capacity and the requirements. This will help you avoid any performance issues and errors. Let's review the primary requirement:
- Operating System: Revit requires a 64-bit version of Windows 10. A 64-bit operating system can handle larger amounts of RAM more effectively, which is crucial for running complex architectural software like Revit. This guarantees improved efficiency and enhanced management of extensive Revit models.
- Processor: Revit performs optimally with a Multi-Core Intel® Xeon® or i-Series processor, or an AMD® equivalent that supports SSE2 technology.
- Memory: A minimum of 8 GB RAM is required, but 16 GB is recommended for optimal performance. Having more RAM allows Revit to handle more complex tasks and larger files without slowing down. This is particularly beneficial when working with large Revit families and detailed Revit rendering projects.
- Display: A screen resolution of 1,280X1,024 with true colour is the minimum requirement. Higher resolutions will provide better visual clarity and more workspace for your design tools. This is beneficial for detailed Revit modelling and reviewing intricate designs.
- Graphics: It is highly essential to have a DirectX 11 compatible graphics card with Shader Model 5 and at least 4 GB of video memory. A powerful graphics card is essential for handling complex graphics in Revit 3D modelling and rendering. It ensures that project visualisation is smooth and detailed.
- Disk Space: You must ensure you have a free disk of at least 30 GB space for installing Revit in your system. Adequate disk space ensures that the software has enough room to store temporary files and handle large project files efficiently. This is critical for smooth operation during the design and Revit architecture rendering processes.
Revit requires Windows 10/11 (64-bit), a multi-core processor, 16 GB RAM, a DirectX 11 GPU, and at least 30 GB of free storage.
%202.jpg?width=767&height=168&name=BIM-AC(Course%20Banner)%202.jpg)
2. Steps to Create an Autodesk Account 
To download Revit, you need an Autodesk account. Have a look at the detailed step-by-step procedure for creating one:
- Visit the Autodesk Official Website: Go to the Autodesk official website. This is the first step to accessing all Autodesk products, including Revit downloads and tools for Revit architecture.
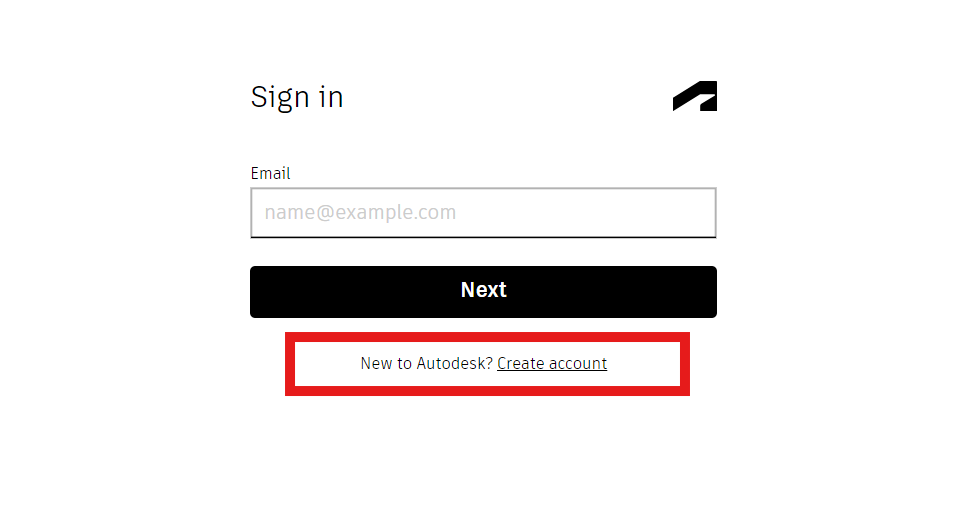
- Open Sign-up Page: Select the "Sign In" option in the upper right-hand corner of the homepage and select "Create Account." This will take you to the account creation page where you can fill in your details to start the process.
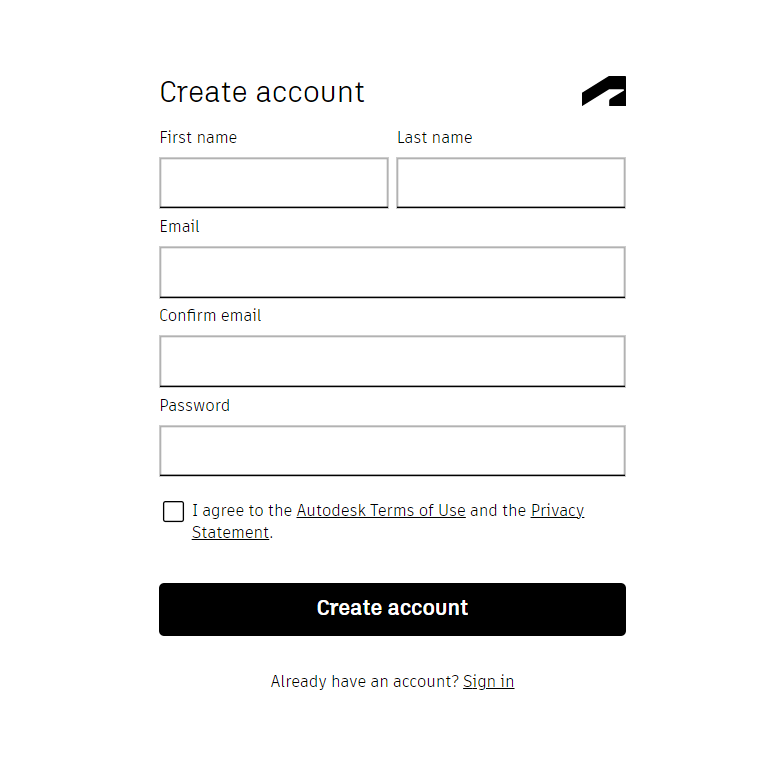
- Add Personal Details: Enter your first name, last name, email address, and create a password. It is crucial to use a valid email address as you will receive a verification link on it to verify your account. This step is crucial for accessing features like Revit rendering, Revit family creation, and other Revit tools.

- Verify Your Email Address: Check your email inbox for a verification link from Autodesk. Click on the link to verify your account. This step ensures that your account is secure and ready for use, allowing you to explore Revit tutorials for beginners and other resources.
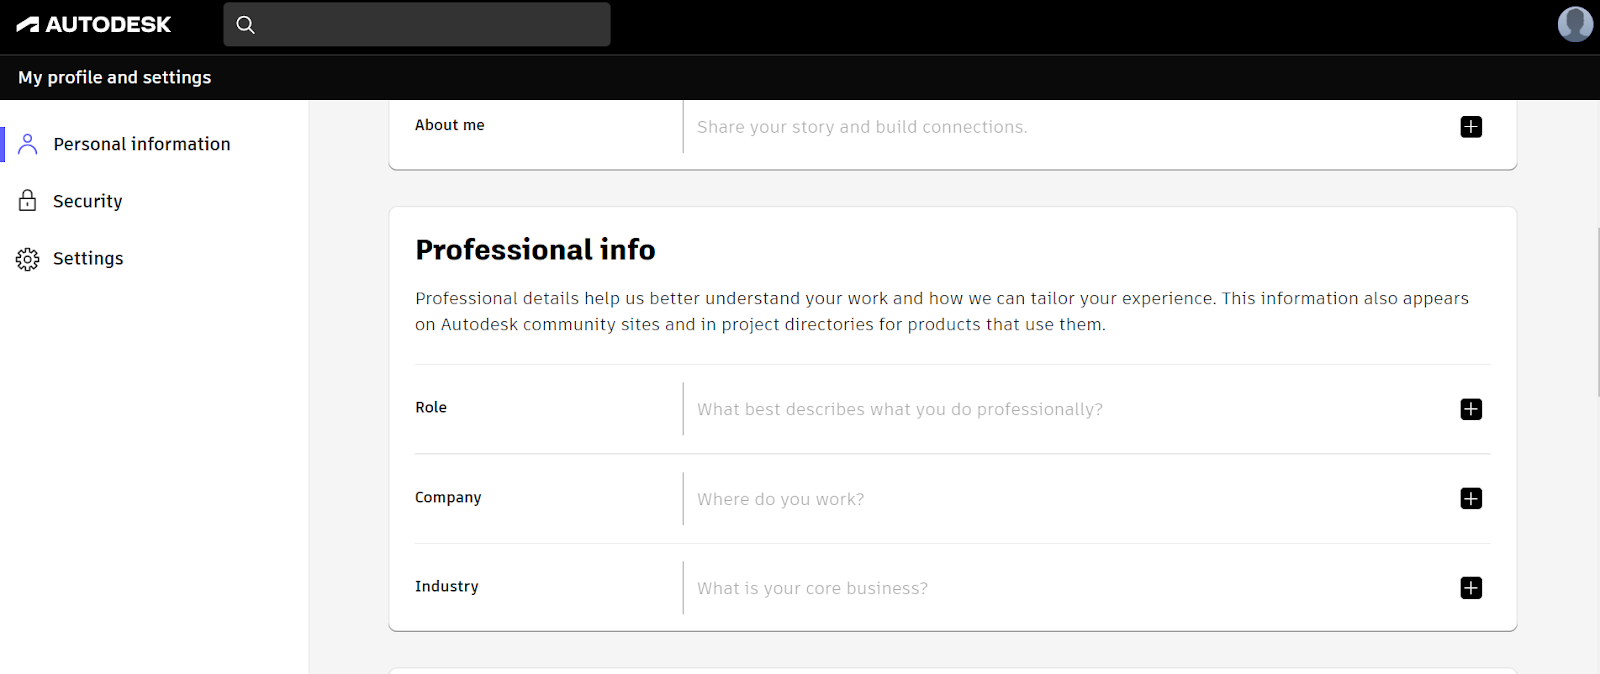
- Complete Your Profile: Log in to your new Autodesk account and complete your profile by adding any additional information required. This might include your location, industry, and preferences. Having a complete profile can enhance your experience with Autodesk products and services, making it easier to manage your Revit downloads and updates.
Visit Autodesk’s website, click Sign In → Create Account, fill in your details, verify your email, and log in.
3. How to Download Revit from Autodesk?
With your Autodesk account ready, you can now proceed to download Revit. Follow these steps to get started:
- Visit the Autodesk Revit Page: Go to the Autodesk website and access the Revit product page.
- Choose the Appropriate Version: Choose the Revit version you need. Autodesk offers several versions, including Revit LT, Revit Architecture, and Revit MEP. Make sure to select the version that suits your needs.
- Start the Downloading Process: Click the "Download" button. You may be prompted to select your operating system and language. After you have made your choices, the download will start automatically.
- Install Revit: Once the download is complete, open the downloaded file and follow the on-screen instructions. The installer will guide you through the process of installing Revit on your system.
From Autodesk’s Revit page, select your version and OS, click Download, and save the setup file.
Also Check out: A Beginner's Guide To Revit: Everything You Need To Know
Explore Novatr's Free Yearly Access to Revit
Novatr offers an incredible opportunity for its learners by providing free yearly access to Revit and other Autodesk software. This initiative allows students to explore and master Revit architecture software without the burden of spending much on software purchasing. With this access, learners can delve into Revit tutorials for beginners, practise Revit 3D modelling, and enhance their skills in Revit rendering and Revit family creation while learning Revit and other 10+ BIM software with Novatr.
Steps to Install Revit Architecture Software
Installing Revit is a simple process, especially if you follow the below steps carefully:
1. After the download is complete, find the folder where the installer file is saved.
2. Double-click the installer file to initiate the installation process. You might need to allow the installer to make changes to your system.
3. Go through the terms and conditions and accept the Autodesk licence agreement to proceed.
4. Choose where you want Revit to be installed on your computer. The default location set is generally fine for the maximum number of users.
5. You can choose to install additional components or tools that come with Revit. These might include Revit tools for specific tasks.
6. Click the "Install" button to start the installation. This process may take some time, so have some patience.
7. The installer will transfer all required files to your system, which may take several minutes.
8. After the installation is complete, click "Finish" to exit the installer.
Run the installer, accept terms, choose your installation path, select content libraries, and click Install.
Revit Post-Installation Steps
For this, you need to verify the installation process. Here are the steps to do that:
1. Look for the Revit icon on your desktop or in your start menu.
2. Double-click the Revit icon to launch the software for the first time. This ensures that the installation was successful and that Revit is ready to use.
If you are launching Revit for the first time, follow these steps:
1. When you open Revit, you will be prompted to sign in with your Autodesk account. This step is essential for activating your software.
2. Revit will guide you through some initial setup steps, such as choosing your default units and setting up your workspace.
3. Once the setup is complete, you can start exploring Revit. If you are new to Revit, consider starting with Revit architecture tutorials for beginners to get a good grasp of the basics.
After installation, check Revit’s functionality. Set up project templates, units, and autosave preferences. Explore sample projects to learn the interface and key tools.
4. Navigation and Initial Setup: Use the Project Browser and Properties Palette for quick navigation. Learn essential tools like zoom, pan, and orbit for smooth model control.
Saving & Organising Files in Revit 
Efficiently managing your projects in Revit requires saving and organising your files properly. This will help you understand the different file types used in Revit and the best practices for saving and organising your work. Whether you are new to Revit architecture for beginners or have been using the software for a while, these tips will ensure your projects are well-managed and easily accessible.
Store, name, and manage Revit files systematically for efficiency.
1. Understanding Types of Files in Revit
Revit utilises various file types, each fulfilling a distinct role in the design and documentation workflow. Below are the primary file types you will come across:
- .RVT (Revit Project File): This is the main file type used for Revit projects. It contains all your project data, including 3D models, views, schedules, and more. When you install Revit and start a new project, you will primarily work with .RVT files.
- .RFA (Revit Family File): Revit families are elements like doors, windows, and furniture that you can incorporate into your projects. These are saved as .RFA files. Understanding how to create a family in Revit and manage .RFA files are essential for adding custom elements to your designs.
- .RTE (Revit Template File): Templates are used to start new projects with predefined settings and standards. These files have a .RTE extension and can help maintain consistency across multiple projects.
- .RFT (Revit Family Template File): These are used when creating new Revit families. They provide a starting point with predefined settings for different types of family components.
Revit uses .RVT for projects, .RFA for families, and .RTE for templates.
2. Saving & Organising Files
When you start a new project in Revit, it is important to organise your files from the beginning. Here’s how to do it:
- Open Revit and Start a New Project: Go to the “File” menu, select “New,” and then choose “Project.” You can use a template (RTE file) to ensure your project starts with the correct settings.
- Save Your Project: Click on the “File” menu again, select “Save As,” and choose “Project.” Give your project a meaningful name that reflects its purpose or location, such as “Residential_Project_MainStreet.RVT.”
Save files using clear names like Office_Project_V1.rvt. Keep them organized in structured folders or cloud storage.
3. Some Best Practices for Saving Files
Organising your Revit files properly will save you time and help avoid confusion. Here are some best practices:
- Regular Saving: Regularly save your work to ensure you do not lose any data. Revit has an autosave feature, but it is a good habit to manually save your project frequently, especially after significant changes.
- Folder Structure: Create a logical folder structure on your computer or server. For instance, have separate folders for different projects and subfolders for various stages or components, such as “Drawings,” “Models,” and “Families.”
- Backup and Autosave: Set up automatic backups and ensure that autosave is enabled. Revit can create backup copies of your project at regular intervals, providing a safety net in case of unexpected issues. To enable autosave, go to the “Options” menu, select “File Locations,” and configure the autosave settings according to your preferences.
- Naming Conventions: Apply clear and uniform naming standards for your files. For example, include the project name, location, and date in the file name. This makes it easier to explore, identify, and manage your files in Revit. For example: “Commercial_Building_NewDelhi_2024.RVT.”
Enable autosave, create backups, and use consistent templates for better project management.
Essential Keyboard Shortcuts in Revit
Mastering keyboard shortcuts in Revit can significantly improve your team’s productivity and make the entire design process smoother and more efficient. This section covers the importance of keyboard shortcuts, basic navigation commands, drawing and modifying shortcuts, and how to customise shortcuts to fit your workflow. So, even if you are new to Revit architecture or are an experienced user, these tips will help you optimise your use of Revit.
Shortcuts speed up modelling and improve workflow efficiency. Key Revit shortcuts include WA, DR, MV, RO.
1. Importance of Keyboard Shortcuts
Keyboard shortcuts are essential for any designer or architect using Revit. They help streamline your workflow by reducing the time spent exploring through menus and commands. By memorising and using these shortcuts, you can quickly perform tasks, switch tools, and manage your projects more efficiently. This is especially useful for complex projects involving Revit 3D modelling and other advanced features. Using keyboard shortcuts in Revit enhances productivity by:
- Quickly access tools and commands without searching through menus.
- Seamlessly switch between tasks and tools, maintaining focus on your design.
- Minimises the need for repetitive mouse movements, making your workflow smoother and less tiring.
They minimize mouse use and save time when working across multiple tools.
2. Basic Navigation Shortcuts in Revit
Exploring your Revit workspace efficiently is vital for a smooth design process. Here are some of the basic and essential navigation shortcuts in Revit:
- Pan: Hold the middle mouse button or use the shortcut Shift + Middle Mouse Button to pan across your view.
- Zoom: Use the scroll to rotate to zoom in and out. Alternatively, you can use Ctrl + Scroll Wheel for precise zooming.
- Orbit: Press and hold the Shift + Middle Mouse Button and move the mouse to orbit around your model. This is particularly useful in Revit 3D modelling to view your design from different angles.
Use the middle mouse to pan, scroll to zoom, and Shift + middle mouse to orbit.
3. Drawing and Modifying Shortcuts
Drawing and modifying elements in Revit is a fundamental part of the design process. The shortcuts mentioned below can dramatically speed up your workflow, allowing you to focus more on the creative aspects of your design rather than on finding tools. Here are some common shortcuts to help you draw, modify, and annotate your designs efficiently:
- Line (LI): Quickly start drawing lines
- Wall (WA): Begin drawing walls
- Door (DR): Add doors to your model
- Window (WN): Insert windows into your design
- Move (MV): Move selected elements
- Copy (CO): Copy selected elements
- Rotate (RO): Rotate selected elements
- Mirror (MM): Mirror elements across an axis
- Trim/Extend (TR): Trim or extend elements to meet edges
- Align (AL): Align elements with other elements or reference lines
- Tag (TG): Add tags to elements for annotation purposes
Common ones include WA (Wall), DR (Door), MV (Move), and RO (Rotate).
Also Check out: The Ultimate Guide to Revit: Key Features, Applications, Benefits, and Plug-Ins
4. Customising Keyboard Shortcuts in Revit
Revit allows you to customise keyboard shortcuts to better fit your workflow and preferences. Here is how you can do it:
- Open the Keyboard Shortcuts Menu: Go to the “View” tab, select “User Interface,” and then click on “Keyboard Shortcuts.”
- Search for Commands: Use the search bar to find the command you want to create or modify a shortcut for.
- Assign a Shortcut: Select the command, and in the "Press new keys" box, input your preferred shortcut combination. Make sure it doesn't overlap with any existing shortcuts.
- Save Changes: Click “Assign” to save your new shortcut. You can also export and import keyboard shortcut files, which is useful if you want to maintain consistency across different systems.
Go to View → User Interface → Keyboard Shortcuts to create or export your own.
Conclusion
In this comprehensive guide, we have covered all the essentials of getting started with Revit, from understanding the important system requirements to creating an Autodesk account. Revit is a powerful tool for anyone in the AEC industry, providing advanced features for 3D modelling, rendering, and project management.
We encourage you to start exploring Revit and its wide array of features. You can also consider joining the BIM Professional Course for Architects and BIM Professional Course for Civil Engineers offered by Novatr and gain comprehensive knowledge and hands-on experience with Revit and other BIM tools. These courses are designed to equip you with the skills needed to excel in the AEC industry.
You can also check out the Novatr’s Resources Page for the latest industry trends, tips, and updates to stay ahead in your professional journey!
With these steps, you can install, set up, save, and streamline your Revit workflows using shortcuts. Improve your skills through the BIM Course for architects by Novatr.
FAQs
1. Can I learn Revit by myself?
Ans: Yes, you can learn through tutorials, online courses, and hands-on projects.
2. Is Revit easy to learn?
Ans: It may seem complex at first, but with consistent use, it becomes intuitive.
3. Is Revit a BIM or CAD?
Ans: Revit is BIM software designed for intelligent 3D modelling and coordination.
.jpg)
.png)